Approve or Reject Leave Applications
Note: Clicking on the screenshots once will enlarge them for a clearer view.
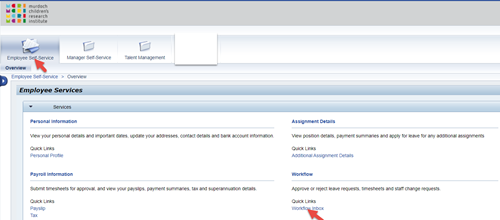
1) Click Workflow Inbox on Employee Self-Service:
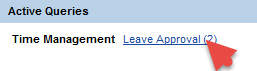
2. Click on the Leave Approval link
3. Click on the leave type link

Note: You can view information such as the “Leave Type”, “Applicant”, “Start date”, “End date” and “Hours” on this screen.
4. Scroll down to view all information and click Approve or Reject. Use the New Note box to add any comment.
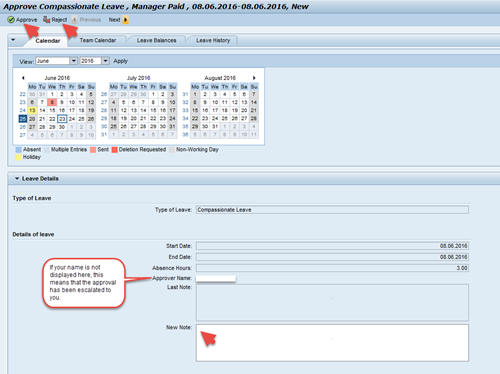
Note: You can use the “Team Calendar”, “Leave Balances” and “Leave History” tabs to assist with the decision. Check “Leave Request” section for descriptions of these tabs and the legends used in the calendar section.
If there are multiple leave requests awaiting a response they can be cycled through (and then processed) by using the Previous and Next buttons (if applicable).
